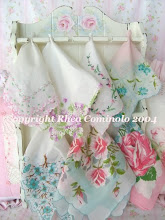
I thought I would share PINK things I made from Easter's Past :) Enjoy !! :)


Thanks so much for stopping by !!! :)
Hugs,
Rhea

 In honor of My Bloggy Friends ( Karla :) ) who like Alice in Wonderland and are going to see Tim Burton's new version of it, I hunted deep into my bedroom closet, in the last box I looked into, to drag out my childhood memento's of Alice for your viewing pleasure :)
 The Caterpillar with the Hooka Pipe ? ummmmmm, what's up with that ???
 Now, the bunny was an ok sort of guy. But again, not in touch with reality. Here is a human girl chasing you all over the place, and you haven't even been properly introduced. Bit weird................Really.........
 Did she just say, "Crown Royal bag" ? lol !! Well, Yepsie, I did. It was in the 70's when I received this book and Mr. Rabbit . Back when they had cocktail parties, and the before dinner drink. My Aunt and Uncle always had a toddy before dinner, and Crown Royal must have been a favorite, because in my toy box at their house, I had my treasures stored in Crown Royal bags. :) I still have one bag with treasures inside.
 No, we probably wont be going to see this new movie.

 I used my ruler to pencil in a straight line for sewing. Now, normally I would use my sewing machine to do the gathering, but it is broken, so I gathered it by hand. You could also use fabric.
  Once I had the length I wanted, I traced the bottom of the cup onto a matching paper, and cut around the outside of the circle with decorative scissors. This will be hot-glued onto the bottom, after the crepe paper or fabric is applied to the sides. I also made a handle from chenille sticks that I wrapped with crepe paper and glued onto the yogurt cup on the outside.
 So, there you have a covered cup that is ready to decorate !! :)
 Here is my finished one. I added more crepe paper ruffle to the inner lip of the cup, trim to cover the sewn seam, ribbons, mica glitter, a rosette with a Vintage Victorian Scrap and Ta-Da !! Easy Peasy !! Right ? :)
 After the circle was cut I traced the bottom of the cup in the center of the circle. This is so when I hot glued the bottom of the cup to the fabric, I could have it perfectly centered. Now, you sewers could do this in an easier fashion, but since I am a poor seamstress, I opted to whip stitch about two inches in and gather. From there I hot glued the fabric to the rim.
 Again, you want to add your handle to the outside of the yogurt cup.
 Here is the basket, after it has been gathered.
  At this point I pull up the fabric edges while hot glueing to the rim of the basket. This gives the fabric a tight look. See the Pink one below. At this point, you are done covering the basket. Now you want to embellish. I added gathered tulle to the inside rim of mine, trim around the gathered part, and paper ruffles to the bottom.
 Ok, Third way to cover the basket. I wrapped my yogurt cup with a sheet of paper tightly , and with my pencil, drew a line below the bottom of the rim on the outside of the cup.
 Once that was traced, I cut along the line, and wrapped it around my cup again, and lightly traced around the bottom of the cup to make my pattern.
 Once you have your pattern, you can trace it onto decorative paper, felt, etc. to make a cover for your basket. I used a glue stick to glue the paper onto the cup. It will only cover the smooth part of the cup and not the rim, that you need to cover up with your trim of choice. On mine, I added the handle, then paper ruffles, millinery and ribbons.
 Ta Da ! Finished basket using third method. :)